Saturday 26 March 2016

'Princess of Pop-corn' Cake

My birthday cake to celebrate my decade anniversary of being 21 years old! ;)


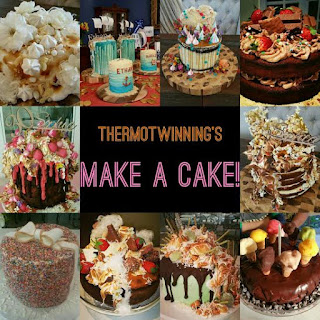
Princess of Pop-Corn cake

The cake consists of 30 second whole orange cake, with cream cheese frosting between layers, torched meringue, toffee and popcorn shards, pink rock candy, edible glitter and gold leaf.

PRINCESS OF POP-CORN CAKE

1. The Cake

I made 3 x 30 second whole orange cakes, the day before assembly. I then cut the tops of each cake, and cut each cake in half to create 6 even layers.


2. The Frosting

I doubled this Cream Cheese Frosting recipe and mixed it for approx 1 minute 15 seconds, with a spatula to assist the stirring. I then placed it in a container to firm up in the fridge (otherwise it can get really sloppy when trying to pipe).

3. The Toffee and Popcorn Shards

I like to make toffee the old fashioned way on the stove top, 1 cup of caster sugar: 1/4 cup water in a stainless steel pot (so you can clearly see the sugar caramelise) on medium heat. Don't stir at all, and just swirl around the contents in the pot as it bubbles and slowly turns into an amber colour. 
In the meantime, microwave the popcorn (I use the butter flavoured popcorn sachets), spread onto a tray, then pour the toffee over the popcorn to set.


4. The Meringue

I used icing sugar instead of milling the sugar in Step 1, as I wanted my bowl super clean and dry for the meringue, so started straight on Step 2. 
(http://www.recipecommunity.com.au/desserts-sweets-recipes/meringues/94467)


5. The Assembly


Place some cream cheese on the cake board (to hold the cake)


Using a thick round nozzle, pipe from outside in - doesn't need to be super neat, but just needs to be evenly piped as it'll all be squished between the cake layers


Repeat for the 6 layers of cake


Finish off the top of the cake, by turning the bottom of one of the cakes upside down (for a sharper finish)


Place 4 x wooden skewers through the cake layers so it doesn't lean (as cream cheese is a bit sloppy at room temp)


Roughly top with meringue, starting from the top, and randomly cascading down some of the sides 


Torch with a kitchen blow torch


Top with the toffee and popcorn shards, gold leaf, edible glitter, pink rock candy and personalised cake topper (if you have one) - I saved this one from my 30th birthday last year!


Thursday 24 March 2016

Coconut Ice Cupcakes

These were my 'bring to the office' birthday cupcakes :)


Coconut Ice Cupcakes

They consist of a vanilla coconut cupcake, torched meringue and topped with a small piece of coconut ice and edible glitter.

COCONUT ICE CUPCAKES

1. Cupcakes:

Made the day before - I made 30 second cupcakes as per the recipe and added an extra 50 grams desiccated coconut. I cooked the cupcakes at 150 degrees for 20 minutes to get a 'flatter' cupcake top for decorating. Once cooled, I stored the cupcakes in an air tight container. (http://www.recipecommunity.com.au/baking-sweet-recipes/30-second-cupcakes/225443)


Cooked at 150 degrees for 20 minutes to get a 'flatter' cupcake top

2. Coconut Ice:

Made the day before - I made the coconut ice as per recipe and let it set in the fridge (http://thermobliss.com/thermomix-coconut-ice/)


Coconut Ice set in fridge and cut into small pieces

3. Meringue:

Made on the day - This was the first time I've ever made meringue in the Thermomix and it was AMAZING!! I used icing sugar instead of milling the sugar in Step 1, as I wanted my bowl super clean and dry for the meringue, so started straight on Step 2. I have made MANY meringues in my Kitchenaid and the most important thing is to have a clean and dry bowl, so I felt that there was less room for failure if Step 1 was omitted (and my bowl had been drying overnight so I knew that it was clear of any water remnants).
(http://www.recipecommunity.com.au/desserts-sweets-recipes/meringues/94467)


Thermomix Meringue

4. Assembly:

In the morning (before taking these cupcakes to work), I made the meringue, roughly placed it in the centre of the cupcakes (leaving a little bit of the cupcake visible) using a up and down motion to create small peaks. I kept the meringue to the centre of the cupcakes so that it would be easily transported, so the meringue wouldn't rub on the other cupcakes. I then torched the meringue with a kitchen blow torch. I then placed a small piece of coconut ice to the side of the meringue (the meringue would collapse if it was placed right on top) and sprinkled with edible glitter.


Place in the centre of the cupcakes and use an up and down movement to create peaks


Torch meringue with a kitchen blow torch


Blow torch the meringue on the tops of all cupcakes


Add coconut ice and sprinkle with edible glitter :)


Sunday 20 March 2016

Pear Porridge (with Oats, Chia Seeds and Coconut)

After making porridge for the first time last week in my Thermomix, I've been experimenting throughout the week with different fruits and combos. This is our favourite so far!


Pear Porridge

This is great for toddlers to self feed as porridge 'sticks' to the bowl and spoon, resulting in less spillage.

This can be pre-made and kept in the fridge/freezer and reheated in the microwave (with a little extra milk stirred through).

PEAR PORRIDGE (with Oats, Chia Seeds and Coconut)

Serves 2 adults

Ingredients:

1 x pear (quartered and cored)
40 grams oats
5 grams chia seeds
5 grams desiccated coconut
300 grams milk

Method:

1. Add the pear to the bowl. 
2. Blitz - 2 seconds/Speed 5.
3. Add the rest of the ingredients. 
4. Cook - 13 minutes/90 degrees/Speed 2/Reverse.
5. Serve sprinkled with sultanas.


Blitz the pear - 2 Seconds/Speed 5


Add remaining ingredients


Cook 13 minutes/90 degrees/Speed 2/Reverse


Serve with sultanas


Saturday 19 March 2016

'Oh Baby Baby' Easter Egg Cake

This cake was made for a good friend whose bub #2 is due on Good Friday. 

This is perfect for an Easter dessert. You can make and decorate your own cake for Easter, and write 'Happy Easter' (for example) on the big Easter Egg (instead of Baby Watts like I've done):


'Oh Baby Baby' Easter Egg Cake

The 'Oh Baby Baby' Easter Egg Cake is a vanilla cake with white chocolate buttercream, salted caramel drizzle, popping candy white chocolate easter egg, milk chocolate easter eggs, speckled egg M and M's, silver cachous, sprinkles and edible glitter.

I bought the popping candy white chocolate easter egg from Aldi, and the rest of the eggs from Woolworths. The silver cachous, sprinkles and edible glitter were from my local cake decorating shop.

1. The Cake...


This isn't the most simple cake recipe, but it the instructions are very clear and it is definitely worth it! I only needed to make one batch. One x batch makes 2 cakes with a decent height when stacked. 

2. The Buttercream...


I used 1 1/2 batches with white chocolate melts. This has been my 'go to' icing lately for cakes as I find that because the mixture has melted chocolate blended through, it sets really nice and firm in the fridge, and doesn't budge when taken out for display at room temperature.

3. The Drizzle...


You can make this earlier and keep it in the fridge in a sterilised container...which lasts for ages! Just keep in mind that it needs to be at room temperature when assembling the cake, so if it is made fresh, it takes a while to cool down as it is piping hot right after it's cooked up in the Thermomix!

4. The Cake Assembly...


Make the cake batter, pour evenly between 2 x 20cm cake tins. Splatter 1/3 cap of liquid food colouring on top of the batter.


Use a chopstick/skewer and swirl around the food colouring in the batter


Bake as per recipe and leave on the bench to completely cool down


Once cooled down, cut the cakes in half through the middle with a really sharp bread knife


Make the buttercream, and spread some on your cake platter for the first layer to rest on (so the cake doesn't slide off when transported)


Layer and spread the buttercream between each of the 4 cake layers (alternating between the blue and red layers)..yup doesn't look very pretty at this stage!


Smooth the sides and top of the cake with a metal spatula/metal scraper


Use the salted caramel sauce (at room temperature!) and with a small teaspoon, drip each 'drip' down the sides of the cake slowly (a little goes a long way to the bottom, so start off with less and build it up!)


Fill in the middle of the cake and carefully spread a thin layer over the buttercream


Decorate with varying sized Easter eggs, silver cachous, sprinkles and edible glitter.


(Inside the cake)


Slices of cake

For more cake ideas, visit Thermotwinning's Make A Cake Page!


http://thermotwinning.blogspot.com.au/2016/05/thermotwinnings-make-cake.html


Tuesday 15 March 2016

Eucalyptus Multi Purpose Spray

I am currently obsessed with Eucalyptus oil for cleaning! I use it to clean/deoderise the toilets, I add a capful with my clothes in the washing machine, cleaning the boys bath, and I looove using it with hot water to mop the floors! I love the smell and everything feels squeaky clean! So I thought I'd make up a multi purpose spray for the kitchen, bathroom and to clean up after two messy toddlers!!


Eucalyptus Multi Purpose Spray

I bought the spray bottle for $2 at the Reject Shop and have seen them at dollar shops, and Coles/Woolworths etc. Ends up so much cheaper than buying a multi purpose spray, and I don't freak out about inhaling it like I do with all the chemical based sprays! In fact, it's fantastic for the sinuses!!! ;)


EUCALYPTUS MULTI PURPOSE SPRAY

Ingredients:

250 grams water
140 grams white vinegar
5 grams dish washing concentrate
5 grams Eucalyptus oil

Method:

1. Add the above ingredients to the bowl. 
2. Mix 1 minute/80 degrees/Speed 1.
3. Pour into a spray bottle. 

Note: Shake bottle before use.


Add all ingredients to bowl


Mix 1 minute/80 degrees/Speed 1


Decant into a spray bottle and enjoy!