Monday, 9 November 2015

"Fairytale Garden" Red Velvet Naked Cake

This year's cake for my mum's birthday is called the "Fairytale Garden" Red Velvet Naked Cake. I really wanted to use my red velvet cupcake recipe as a cake recipe and turn it into a naked cake which is very trendy at the moment!
  
There are 7 elements to this cake recipe:
1. RED VELVET CAKE
This is my red velvet cupcake recipe that I made into a cake. I usually bake the Red Velvet Cupcakes for 20 - 25 minutes, using it for batter for 1 cake takes about 1 hour baking time. I made 2 x cakes for this cake in 20cm cake tins.
Red Velvet Cakes
2.  WHITE CHOCOLATE BUTTERCREAM
I chose this buttercream recipe as it has melted chocolate in it and sets firmer than normal buttercream (which usually just has icing sugar/butter/vanilla extract).
I made 1 x batch of this buttercream which was the PERFECT amount for this cake, and used Nestle White Chocolate Melts.
Place one cake onto the cake board with some buttercream icing (so it doesn't slide when carried)

Place icing on the top of both cakes, and turn the 2nd one upside down onto the icing to create a sharp edge on the top


Cover and spread the buttercream icing on the sides and top with a spatula and dough cutter (to smoothen)
3. SALTED CARAMEL DRIZZLE SAUCE
I used 130 grams brown sugar and 80 grams white sugar, and cooked it for 16 minutes to make it a thicker sauce so it would drip onto the cake nicely.
I placed the caramel sauce in the fridge for about an hour to cool down (slightly cooler than room temperature, but not too cool).
Use a metal teaspoon to drip each 'drip' down the sides of the cake, then fill in the middle of the cake with the sauce.

Salted Caramel Sauce

Drip onto the sides of a cake with a metal teaspoon


Fill in the top middle of the cake with the caramel sauce
4. WHITE CHOCOLATE BARK
Crumple a large piece/pieces of aluminium foil, and roughly paint on gel food colouring of your choice (I used Wilton's gel food colouring - Pink).
Melt 200grams of Nestle White Chocolate Melts in a glass pyrex measuring cup in the microwave for 1 minute on high. Mix it together with a spatula until all melted, and pour/spread it into the crumpled aluminium foil. Place in fridge to set and take out just before placing it on the cake. I used a pair of tweezers to help take the foil out in the parts of the foil that were more creased.

Paint crumpled foil with gel food colouring


Pour and spread melted white chocolate and place in fridge to set

Take foil off the chocolate with the help of tweezers
Place on top of the back half of the cake. I used a few toothpicks to secure it at the back so it wouldn't lean back.
5. MERINGUE KISSES
I placed a few large and small meringue kisses on the top of the cake and a few on the platter.

Meringue Kisses
6. BUTTERCREAM STARS
I had run out of the white chocolate buttercream for the cake, so I cheated and used Betty Crocker's Vanilla Icing (as it is just a tiny bit that I needed and I didn't want to make up a huge batch of buttercream for just a few little 'stars'. Mix in Wilton's Gel Food Colouring - Teal - I dipped a toothpick into the gel colouring and it was enough to make a vibrant teal colour, mix together and pipe with a small star icing tip. I piped random stars on the cake and platter.

Vanilla buttercream with teal colouring
7. EDIBLE FLOWERS
If you search on Google, there are surprisingly a huge amount of flowers which are considered 'edible' (though I wouldn't actually EAT the whole flower!) but they are safe for putting onto a cake that you're going to eat! These flowers I used are from my mum's flower garden so have no pesticides etc. I picked them in the morning on the day I used them for the cake.

Freshly picked flowers from the garden

'Fairytale Garden' Red Velvet Naked Cake

Back view

My Mum - the birthday girl with her grandsons
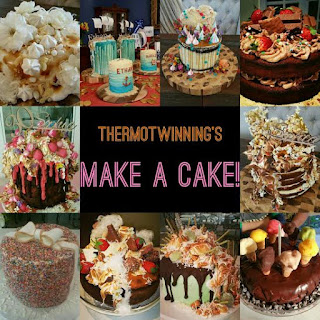

http://thermotwinning.blogspot.com.au/2016/05/thermotwinnings-make-cake.html

Sunday, 8 November 2015

Meringue Kisses

To top my mum's birthday cake this year, I wanted to do coloured meringue kisses which I've seen a lot of cakes decorated with lately!
 
 
Meringue Kisses
 
I haven't actually tried making meringues yet in my Thermomix, however I have to 'justify' having my Kitchenaid, so I make my meringues in that!! ;)
 
Meringue Recipe:
 
 
I watched several Youtube videos on how to get the colour through it, but a lot of them overcomplicated things, it really is just as simple as painting inside a piping bag, filling up the bag and piping it as normal, putting more pressure at first to get a thicker base, and reducing the pressure as you lift up vertically to get a thin pointy tip. The first few ones that you make will come out not as perfect, but you will get the hang of it as you keep piping them!
 
I chose Wilton's gel food colouring - Pink and Teal colours as I really love the colour combo!
 
 
Gel food colouring
 
With a clean small paintbrush, I painted a few thin stripes of the food colouring into the piping bag - I used a large round tip for the larger meringue kisses, and a small one for the smaller ones.
 
 
Paint inside a piping bag
 
I then made my meringue with the above recipe. My biggest tip is to use MEDIUM speed the whole way through (I used Speed 6 on my Kitchenaid). My first try I used a high speed (Speed 9/10) and it was a massive fail, ending up looking like unicorn poop!
 
 
Failed it on high speed, Nailed it on medium speed


Perfect Meringue!
 
 
Piping large and small meringue kisses
 

I made the meringue kisses the day before decorating my cake, and it was a very humid day so the meringue's weren't as crunchy as they should be. My biggest tip to retain freshness is to place the meringues back in a 90 degree oven (doesn't need to be preheated) for 30 minutes, and they will came out like they were freshly made with a melt in your mouth crunchiness!

These look beautiful to decorate cakes or cupcakes, to add to the side of desserts, or to eat as a party snack!


Saturday, 7 November 2015

Apple Puree

This is great for baby food, kids (with cereal, yoghurt or plain), adults also with cereal, yoghurt or as an apple sauce to go with a pork roast. It can be kept in the fridge for a few days, or it freezes really well in ice cube trays and taken out and defrosted over a few hours or in the microwave when needed.
 
Having 2 huge and growing twin boys, I have made A LOT of fruit puree, particularly apples which are cheap and available throughout the year. It is great for a snack or dessert by itself, or with yoghurt or cereal. I have also used this for apple sauce for the adults with a pork roast.
 
 
Apple Puree
 
Now that the boys are toddler age, they are now enjoying their whole apples which they call 'balls' (they are obsessed with anything round shaped!), but means I am left with my apples looking like this, with them needing to be eaten up asap!
 

Toddler attacked apples
 
This is a great way to use up your toddler attacked apples, apples that are getting a tad old and not as crunchy, or even freshly bought crisp apples!
 
I leave on the on the skin on as it contains a lot of vitamins and nutrients, but I used to peel the skin off when the boys were about 4 to 9 months when they had more sensitive stomachs.
 
FRUIT PUREE
 
Ingredients:
 
5 large apples, or A LOT more until you fill up the Varoma tray!
(you can make a mixed fruit puree and add whatever fruits you like, I have used different types of apple, pear, peaches, nectarines, and berries)
 
Method:
 
1. Fill the bowl with 1L of water.
 
2. Fill up the Varoma steaming tray with apples cut up into 8ths (quartered, cored, then cut the quarters in half).
 
 
3. Cook 20 minutes/Varoma/Speed 2.5.
 
 
4. Once cooked, take the varoma steaming tray off, and empty the water out of the bowl.
 
 
5. Tip the cooked apples into the bowl. Cover with lid and MC.
 
 
6. Blitz 30 seconds/Speed 4 slowly progressively increasing to Speed 9. Note: it will explode out of the MC if you blitz the hot apples on a high speed quickly - needs to be done progressively! 
 
 
This can be kept in the fridge for a few days, or it freezes really well in ice cube trays and taken out and defrosted over a few hours or in the microwave when needed. I usually freeze in ice cube trays and decant them into labelled ziplock bags.

Tuesday, 27 October 2015

Goats Milk Liquid Soap

My brother just gave me some soap he made including some lovely goats milk soap. So I thought I would turn it into liquid soap to fill up my new soap pumps!
 
 
Goats Milk Liquid Soap
 
All you need is any 120 grams soap bar and 8 cups of water! It can be a creamy/clear cheap/expensive bar, and it all should work the same! You can add extra colouring or fragrance, but I left it pure so I could use it for the boys' sensitive skin!
 
Liquid Hand Wash Recipe:


120 grams soap
 
 
Cut into cubes
 
 
I blitzed for 20 seconds from working from Speed 5 --> 8
 
 
I melted at 90 degrees/Speed 3 in 2 minute increments plus added approx. 100mls water - took about 10 minutes total for the soap to be all melted
 
 
Added 8 cups water through the MC hole slowly and mixed 2 minutes/80 degrees/Speed 2
 
 
Pour into a large bowl to cool and thicken
 
 
The froth disappears after a few hours. Stir every hour (or when you remember and walk past it!)
 
 
It took over 24 hours for mine to thicken. Before the boys morning nap (the day after I made it) it was still very liquid, then after their nap 2 hours later it had magically thickened (has a kind of 'snotty' texture)
 
 
Goats Milk Liquid Soap!
 
 
Made enough liquid soap to fill up 4 pump bottles with lots to spare which I will probably use for body wash too!


Sunday, 25 October 2015

Rhubarb, Apple and Strawberry Custard Crumble

After buying some fresh produce from the local markets today, I was inspired to make something with the rhubarb I bought! I have never cooked with rhubarb before, but the first thing that came to mind was apple and rhubarb crumble!
 
 
 Rhubarb, Apple and Strawberry Custard Crumble
 
I came across this recipe and added strawberries freshly picked from my dad's yard.
 
Rhubarb, apple and sour cream custard crumble:
 
 
This recipe stood out to me as it included the custard with the crumble - custard is usually added when the crumble is being served so bonus points that it was all in one! However my favourite plus side of this recipe is that there is no washing required between the fruit --> custard --> crumble layers.
 
 
Add 6 x apples (I used 5 red, 1 green) + 1 bunch of rhubarb + 1 tsp cinnamon + 50 grams sugar (maxed out my TM5 bowl!)
 

20 seconds/Speed 5 stirring with the spatula through the MC hole
 
 
Fruit mixture
 
 
Place fruit mixture in a large baking dish - Bake for 10 mins at 200 degrees (preheated)
 
 
After 10 minutes of baking
 
 
Add 400 grams sour cream + 2 tsp vanilla extract (I used my homemade one) + 60 grams sugar + 2 eggs + 20 grams cornflour - Mix 5 seconds/Speed 6
 
 
Pour custard over fruit mixture
 
 
Place a punnet of washed and quartered strawberries over the custard
 
 
Add 100 grams oats + 100 grams almonds + 100 grams shredded coconut + 100 grams butter + 100 grams brown sugar + 1 tsp cinnamon + 1/2 tsp nutmeg
 
 
Turbo function x 4
 
 
Place and spread crumble mixture evenly over fruit and custard mixture. Bake for 25 minutes in a preheated 180 degree oven
 
 
Ready once the crumble has browned - Rhubarb, Apple and Strawberry Custard Crumble
 
 
This is after 5 generous servings - conservatively serves 12!
 
 
Rhubarb, Apple and Strawberry Custard Crumble